Why do we colorize digital negatives?
At the beginning of the digital negative era, around the early and mid ‘90s, the inks of the digital printers had poor UV filtering ability compared to what you find today.
For printing in some Alternative Photographic processes that have an extended exposure scale like platinum palladium you need a very dense negative to block UV light so to have paper white in their very long exposures.
Dan Burkholder introduced the use of a colored negative in those years, because color inks had more UV filtering ability than the black ink at that time. He introduced a simple way to do it, but since then a lot has changed although it is still a valuable concept today.
An evolution in colorizing digital negatives.
The first technique to colorize a negative was by adding over the digital negative image, a new layer filled with a specific color, normally greenish or reddish chosen by experience.
An evolution happened to find a more precise color. With that you could find the best color matching your own printing process which is the sum of all your darkroom variables, not only the emulsion type you use, and give you a better result.
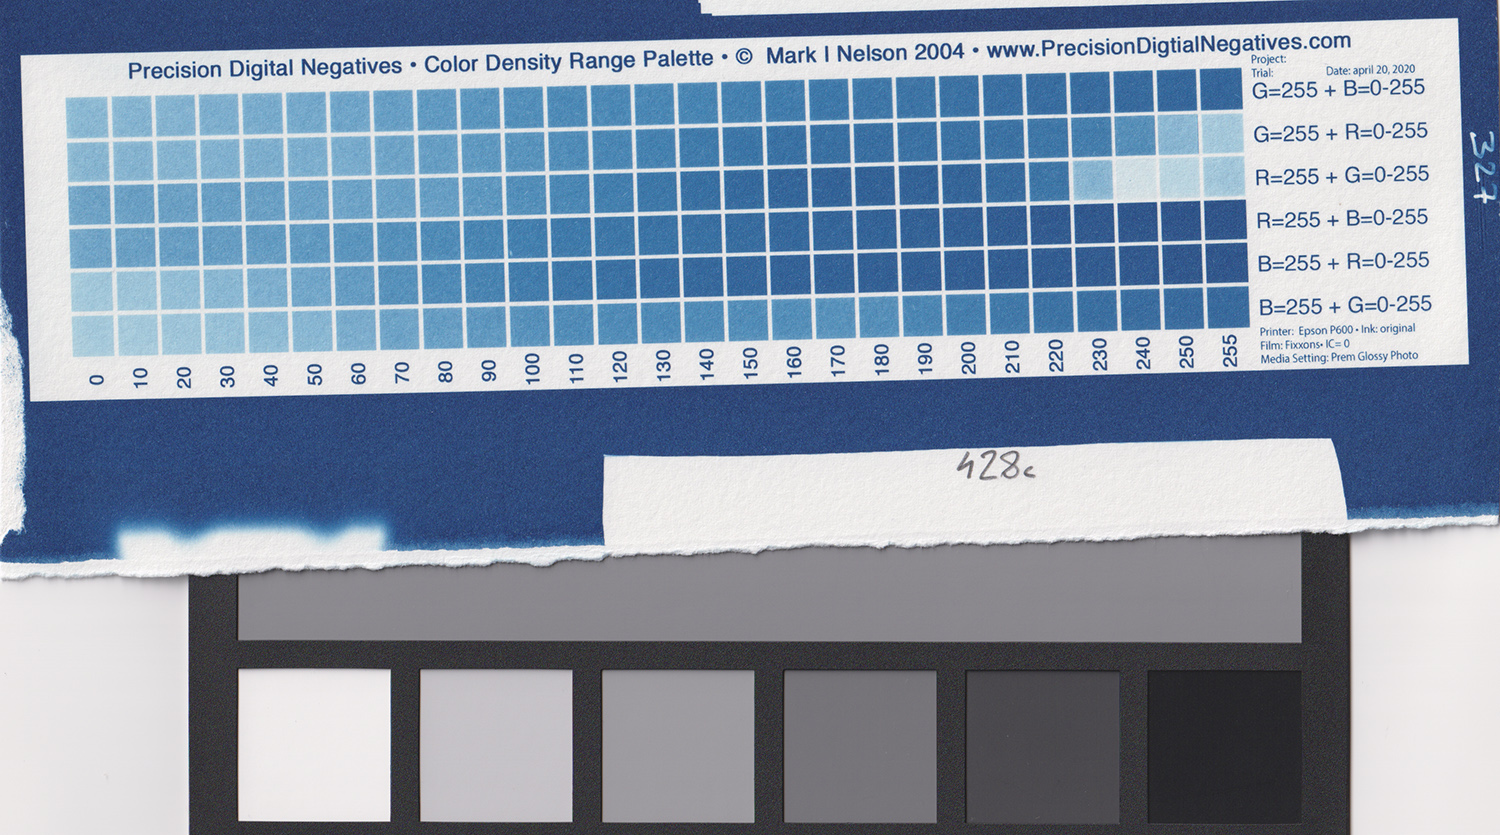
Mark Nelson created a calibration system called Precision Digital Negatives (PDN) where you can test what color you have to use with your process for best UV filtering property. His patented Color Palette only uses primary R, G, B colors, pure or mixed together, and no black. To make this system work, he tells you to use the printer setting NO color management so the printer uses the R, G, B inks only and NO black ink. His system is very well known and appreciated for the precision of its results.
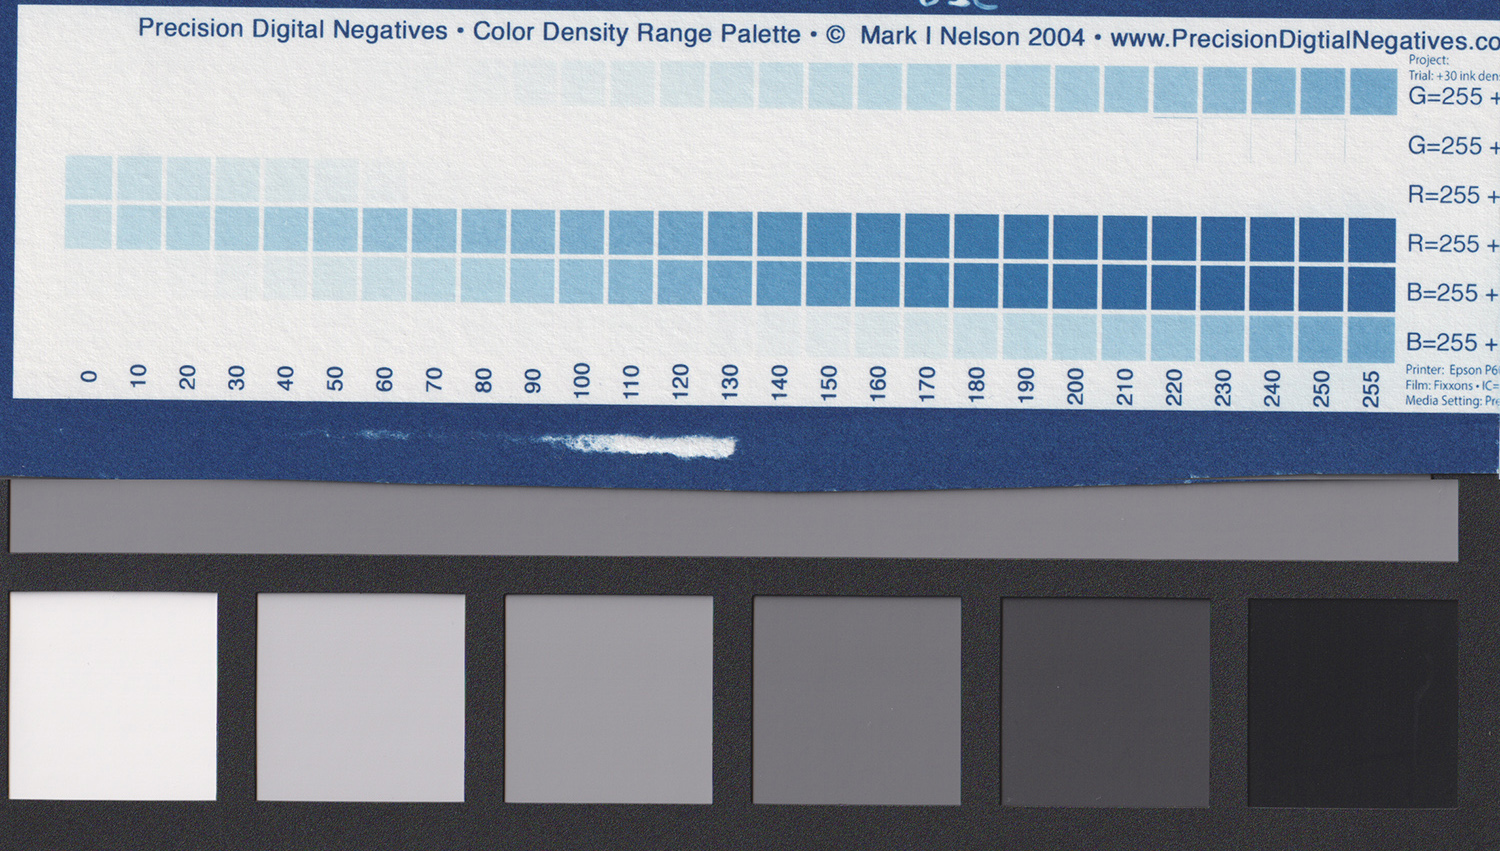
I tried it with classic cyanotype and printed the Color Palette using my Epson P600. I could not reach paper white in my test print using the standard (zero) ink level (quantity) while printing the Color Palette on the transparency film, so I had to raise my ink level through the printer driver (not all the printers allow you to do that) and finally had paper white.
Nowadays the inks of the best inkjet photographic printers are of a very high quality and have a very high UV filtering ability, specifically when they are pigment based inks.
The printer drivers use modern technology and science to define how to mix all the inks to smoothly produce the tone you want, and the black inks give very high densities, enough to print a digital negative for classic cyanotype without having to raise the ink density level; on the contrary, you may find yourself lowering it a bit, depending what printer you use.
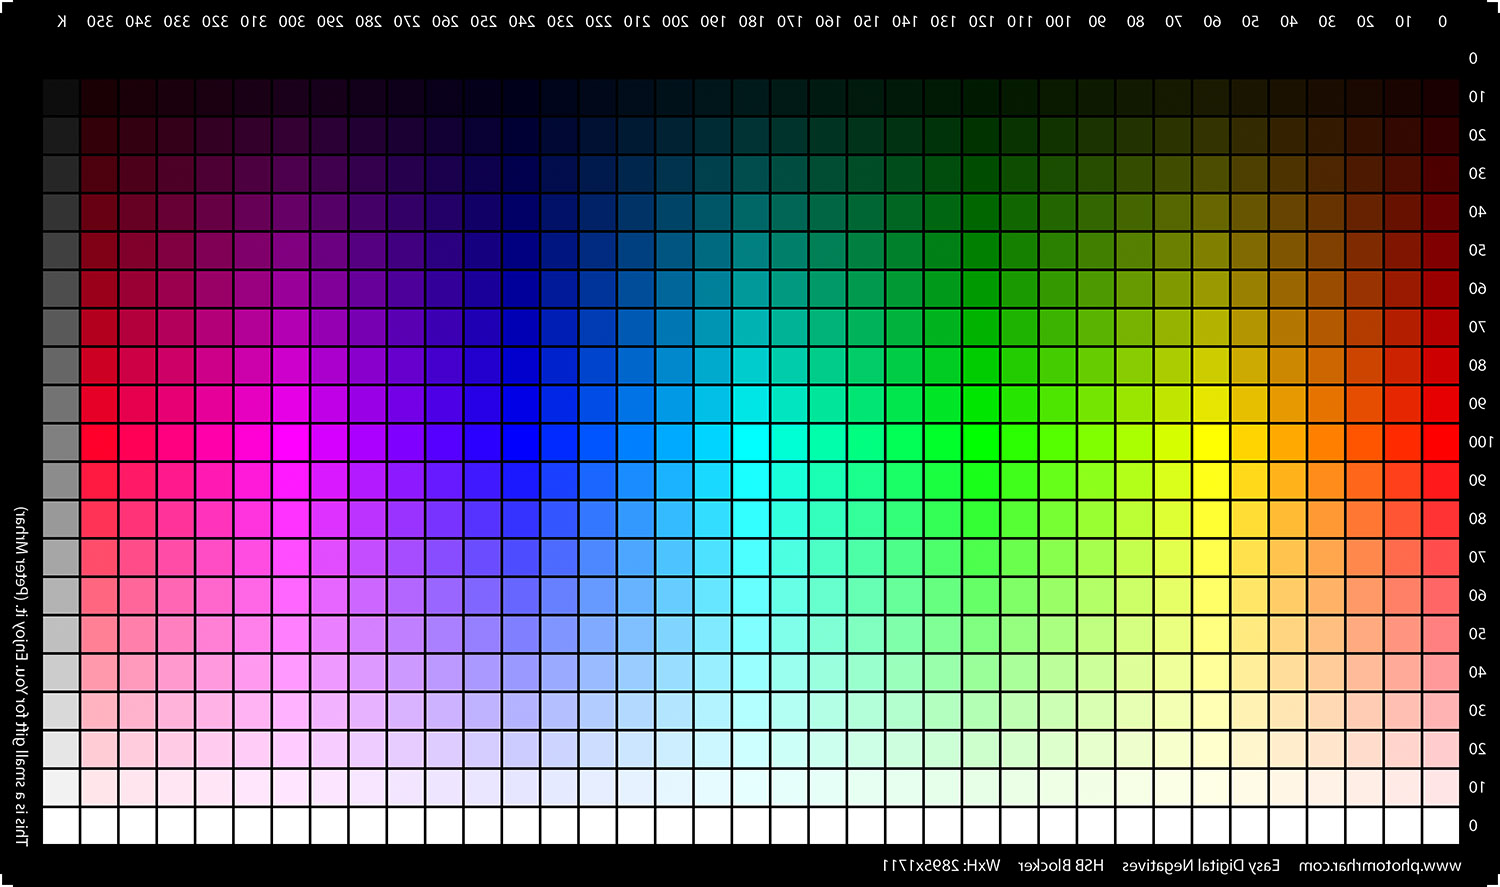
Peter Mrhar created a calibration system that I also use, called Easy Digital Negatives (EDN). The EDN Color Blocker free tool makes you use an HSB color image to define, with precision through a test print, the Optimal Color Blocker correct for your process.
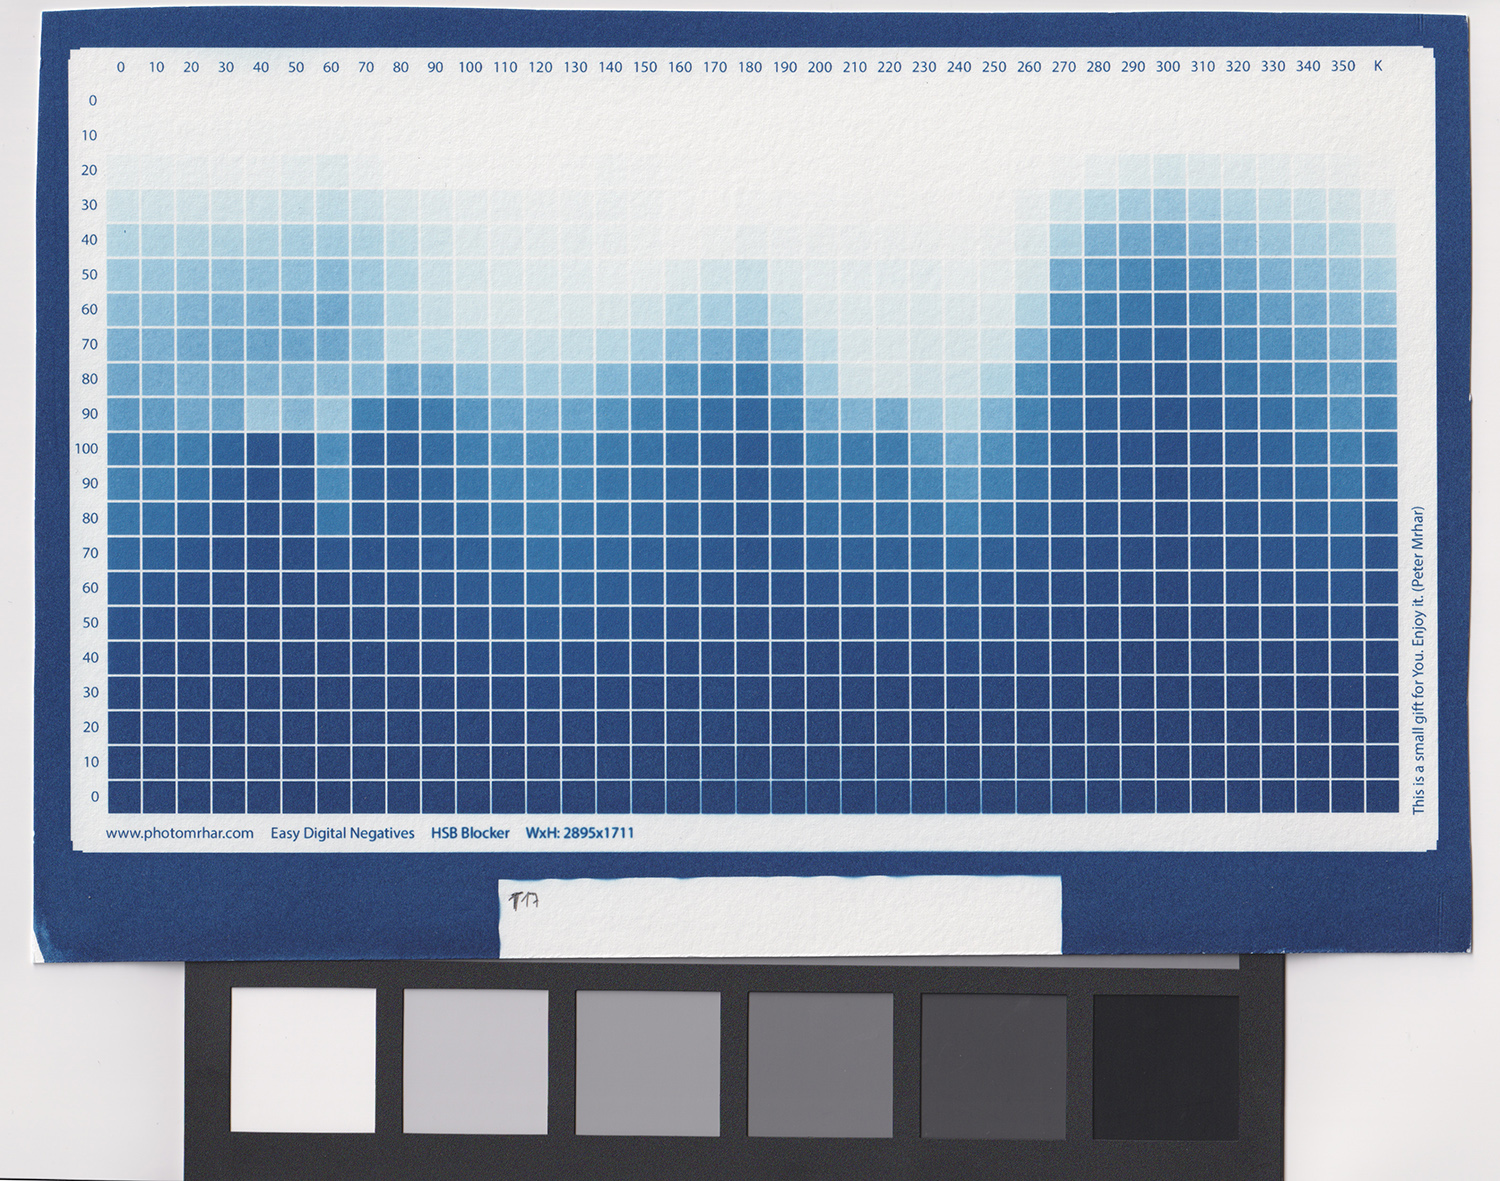

There are many print makers using EDN that are not clear how the Color Blocker tool works, so I will give a short explanation.
The tool reads your HSB test print, like mine in classic cyanotype, and goes through the following important automatic checks:
- what colors give you “inversion of tone” (a) in the print and exclude them (e.g. color columns from 0 to 130 in the image above).
- what specific color, among those remaining available, gives you the most extended range of tones (b) to help the calibration (column 350 in the above image).
a) Being clear that the dark tones in a negative produce light tones on a print and lighter tones in a negative produce darker tones on a print, you have an “inversion of tone” in your print (someone calls it “solarization”) when a dark tone in your negative blocked less light than a lighter tone. This prevents your photo from having smooth gradients and faithful reproduction of tones.
b) When the EDN Color Blocker system chooses the color with the most extended range of tones means that you have more color difference/tonalities to reproduce the tonalities of your photo. Consider it as if you want to make a b/w pastel painting having 3 pastels only (black, medium grey, white) or if you have 6 different pastels in tones of grey instead. Of course having an extended range of pastels will give you better smoothness and transitions in the shades of your painting.
Without those two checks, a dense enough but wrong color may give you bad prints without you knowing it or understanding how to solve the problem.
This colorizing system gave me more than sufficient density to print my classic cyanotype with the standard (zero) ink density level of my printer Epson P600, since it uses all the inks including the black ink cartridge which in my case is a pigment based ink.
I could actually use a negative value of ink density in the printer driver (maybe -5, or -10) saving ink and faithfully print my cyanotypes.
As a matter of fact, having a digital negative that was a bit denser than needed created an area of paper white wider than desired (Image 4), so I decided to extend the tones of my print using some citric acid in my development stage (Image 5). This worked well with cyanotype, for other processes you might have other ways to control the general contrast, or you may choose to reduce your ink density if your printer allows that.
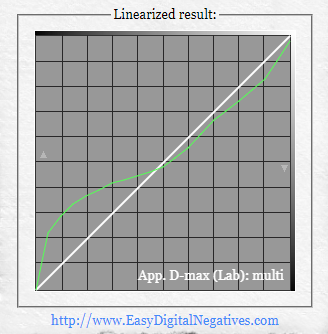
I find another very important advantage in the EDN Color Blocker tool. It lets you download your colorizing layer not only as a Gradient Map but also as a LUT file, and inside the LUT file the color hue chosen as your Optimal Color Blocker changes to adapt to the different areas of your photo (dark areas, midtones, highlights) and doing so you have the best color choice possible, creating the premise for a milder correction curve when calibrating your digital negative, and a mild correction curve means less artifacts and best precision in tone reproduction.
Generally speaking, the LUT file of the Optimal Color Blocker performs as a former correction of your negative, so that you’ll need a very light calibration curve. That curve depends also on the printer settings of your choice while printing your digital negative, that will be the subject for another article.
This is an external resource of the video course Digital Negative for Alternative Photography. You can read more about it in this website clicking HERE.